We are here with a really exciting update to our iOS app — advanced filter adjustments! We have been wanting to add this to the app for so long, and we are SO glad it’s finally here for you to use and enjoy. ? Let’s take a look at how it works!
1
apply filter, then tap to reveal advanced filters
2
adjust to customize the filter to your style
And that’s it! You can still adjust the opacity of each filter, and now you can edit the brightness, warmth, and saturation of the filter itself before making other adjustments. Your colors can now be customized more than ever before!
If you have any questions about the 4.1 update or any other features in the app, we are here to help at hello@acolorstory.com. Thank you for using A Color Story!
With all the earth blooming in spring and the sun shining a little longer into the evenings, we figured this was the perfect time to introduce Elsie’s Glow effects in a tutorial! Glow is currently featured in the new Steffy Collection, where you can get Glow along with filter +packs Harvest Moon, I Am, Twilight, and effect +pack Texture for a 33% savings. Can we say, bonus?!
Here is a look at each effect, all applied at 100% intensity.
ORIGINAL
quartz
A lovely pink glow to add to any photo!
Warmth
Like the sun, with an intense yellow center that diffuses along the edges
Glimmer
Cutie little gold dots to give a glimmer! We also like applying this one twice for greater intensity
glow
A bright, white beam! This one takes on a circular effect
Lumen
Lumen is another bright white, with a more organic shape
beaming
This effect almost mimics a white Color Fog, with a nice diffusion along the edge
disco
Love the bright dots featured here, like the light reflected from a disco ball!
Burst
Burst features a bright, round light with a rainbow
rainbow
Loving this one! A bright, pink + yellow beam that diffuses into a rainbow prism
prism
A magical effect featuring a bright, widely dispersed prism
Party
The vibe is in the name!! This reminds us of the way lights hit the dance floor
aura
Obsessed with the opacity + color on this one— you can see it’s a bright red. Layer it on a blue sky for a lovely violet!
vibes
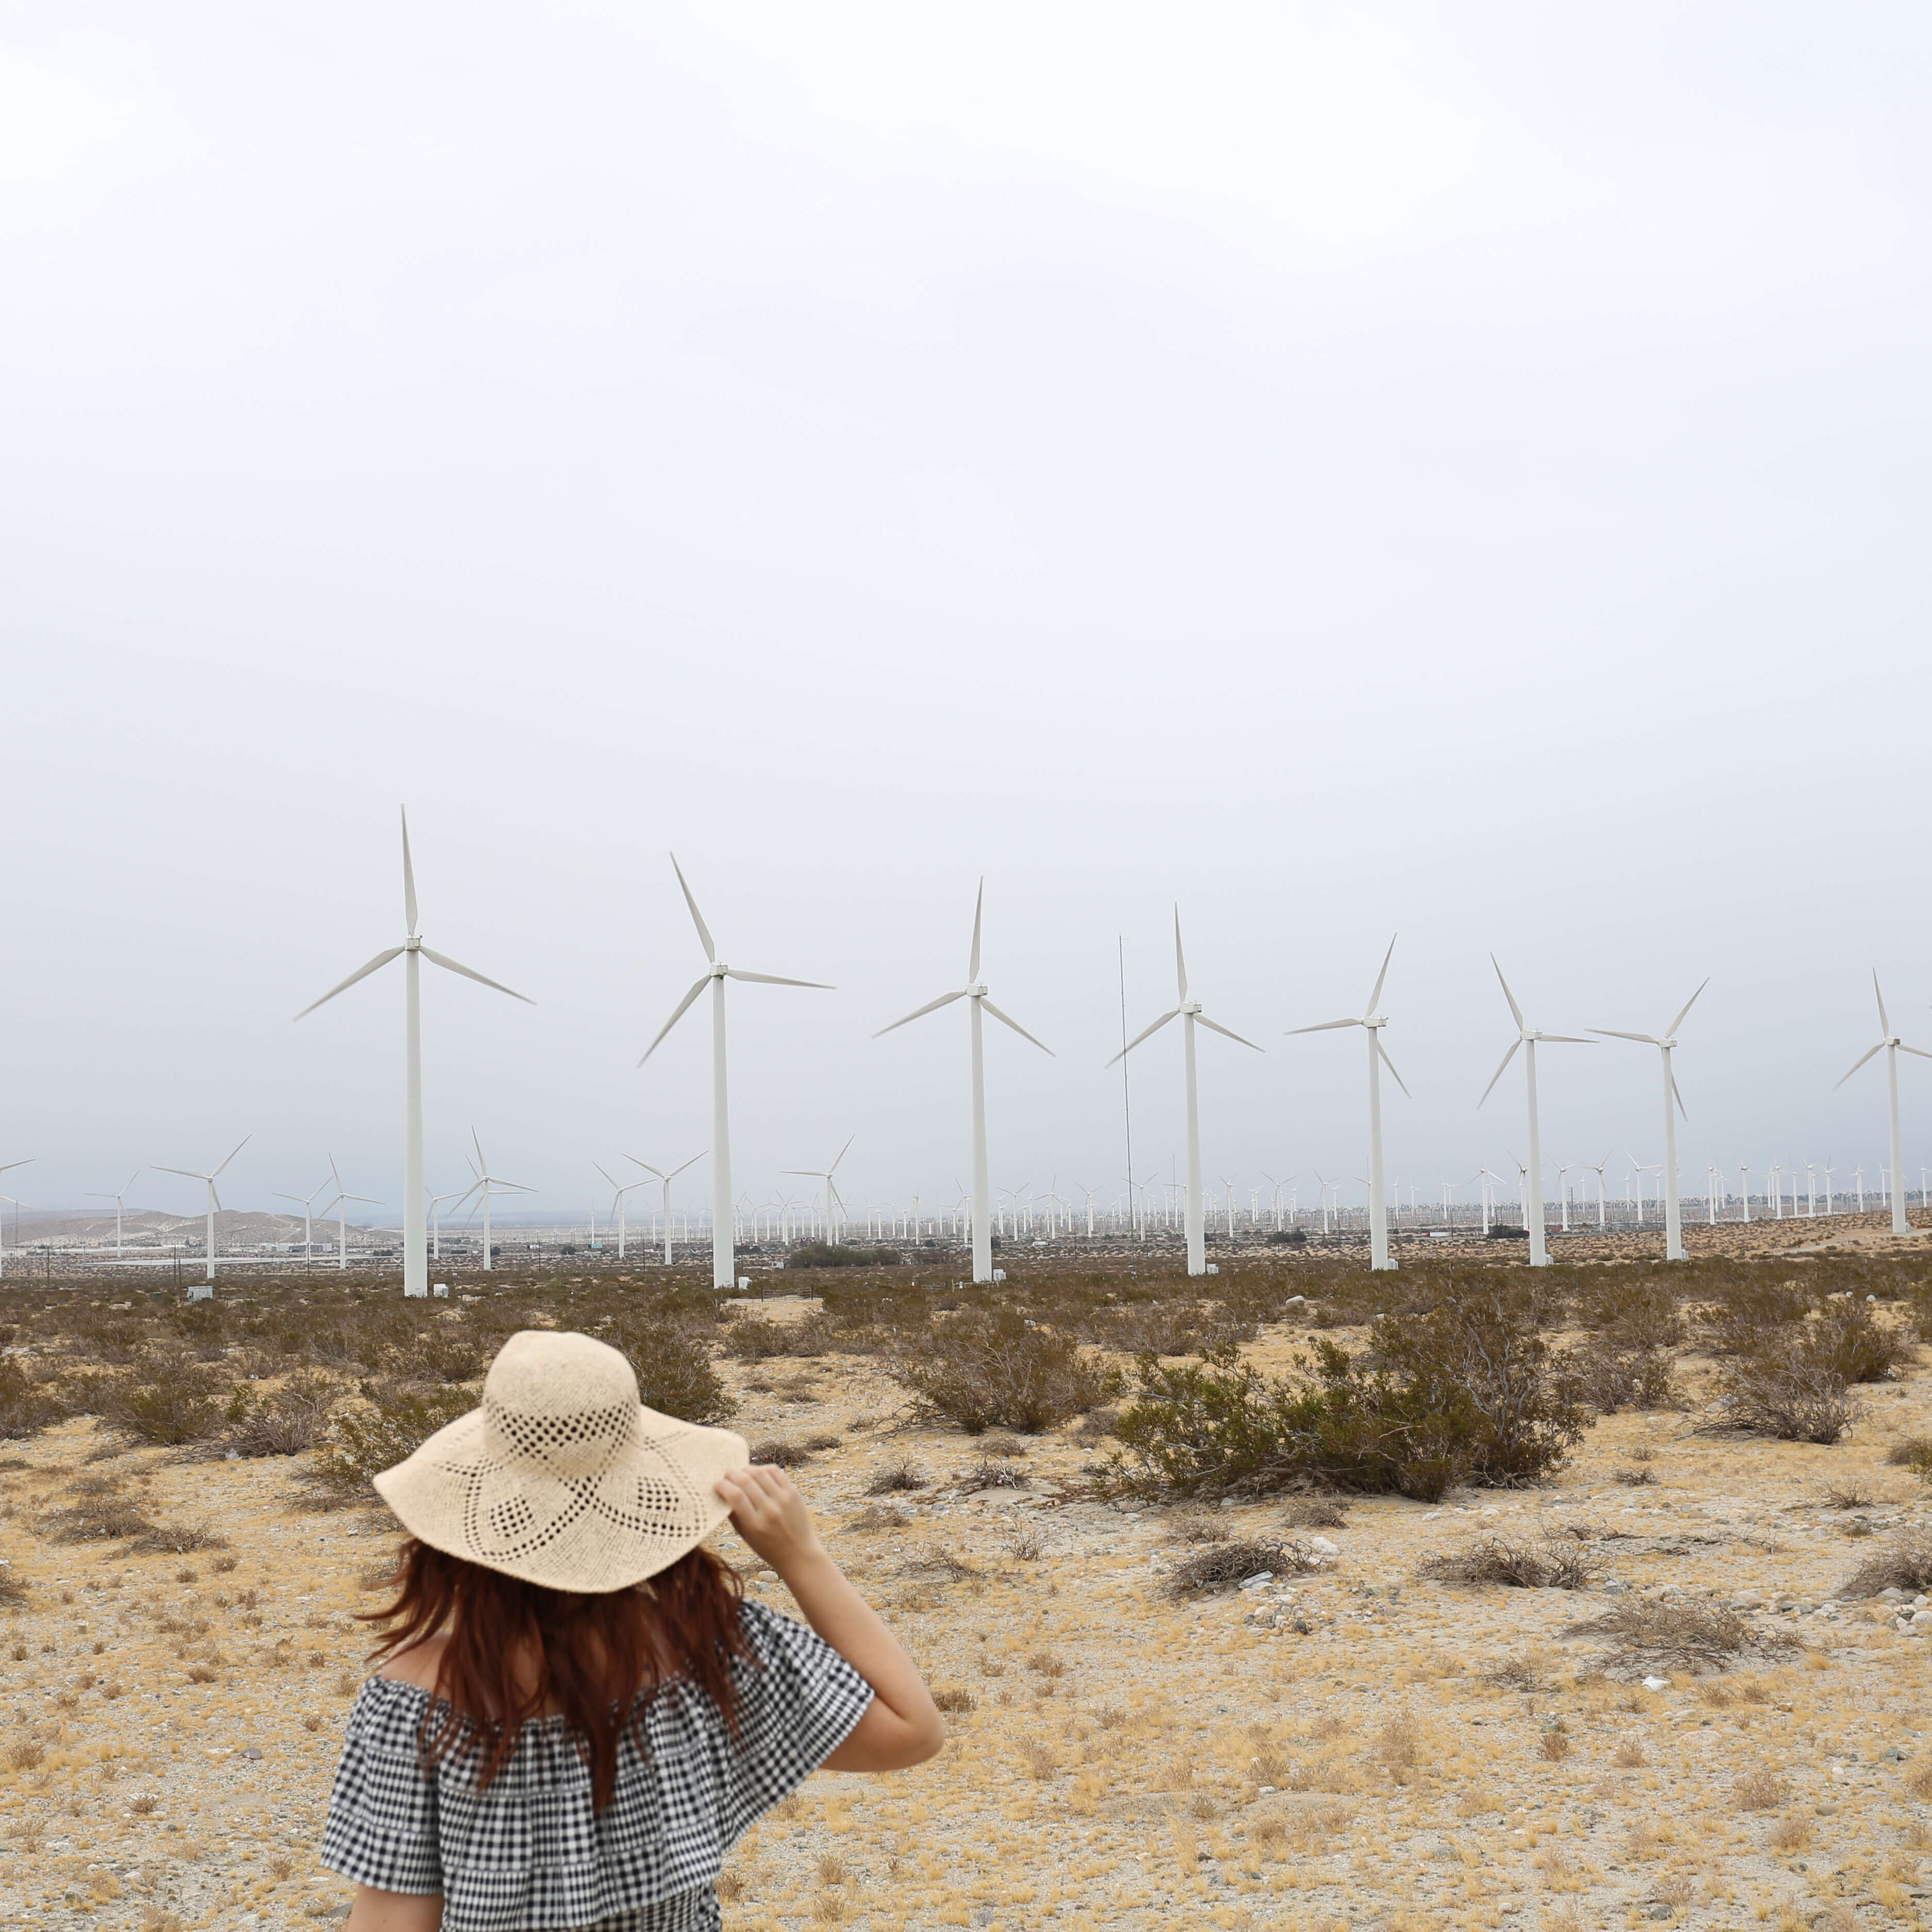
The rainbow glow on this one is subtle and surreal! We can see this one used in a lot of travel photos
crystal
An overall bright white with a red beam—use this one at a lower opacity for a hazy effect like shown above
Radiant
This one makes a statement with yellow, orange and red hues for a bold effect
Burn
Loving how this effect applies to the edge of the photo, adding a prism and a bit of grain
Let’s take a look at a few before + afters with some of these effects applied! Remember, with effects, you can drag them around in the app to choose where you’re applying them on the image.
After
Before
The sweet photo above was edited with the Glimmer effect! For this one, we applied Glimmer four different times to have a more intense effect. Love to choose just the *perfect* amount of this fairy light effect to add.
After
Before
The above photo was edited with the Burn effect. This one adds a fun feel to this photo of Elsie with some of her record collection.
After
Before
Finally, the photo above was edited with Vibes, and it definitely gives us road trip vibes. ? Dying to go on a road trip soon, but for now, we’re having fun posting #latergrams with all these effects from Glow!
You can try these effects yourself in the app, or as part of the Steffy Collection. Happy editing!!
I LOVE ME SOME LENS FLARE. When I first started photography, lens flare was like this inconsistent unicorn that would appear then vanish. I felt like I was lucky to get it, but found it impossible to control. (Like that wild horse in every wild horse movie from my childhood. Amiright? No? Just me?)
But after a bit of observation, I realized it’s more predictable than I thought. It actually can be tamed! (Just like the end of that wild horse movie when you realize it’s actually lovely and also that maybe there’s a wild horse in all of us? Amiright? Too far?)
OK, enough with the wild horses. Here are 3 tips to controlling lens flare and making it work for you.
1
Look for the edge of light
See how Leah is standing in the shadow cast by the building right before her
To look for the edge of light, look down first, not up. Lens flare only happens when the light source is being partially blocked by something. If you stand on a shadow YOU are literally at the spot where that’s happening. No more looking up with a camera to your eye and doing like a weird square-dance number and possibly running into people until you see that light refract.
If your subject is a person, have them stand on the edge of light, then the light will refract all around them too.
You can learn more about standing on the edge of light in this post about tips for shooting in direct sun.
2
choose camera settings according to your style
Left: f/2.0 Right: f/22
This is like a ‘choose your own adventure’ time! Are you going for a soft, glowy look to the lens flare, or a sharp, graphic refraction? Set the aperture of your DSLR camera accordingly.
Set a low f-stop for soft and glow. Think f/2.0 or lower.
Set a high f-stop for sharp, graphic refraction, starbursts with lots of extra spots and rainbows. Think f/12 or higher.
I tend to choose soft and glowy for portrait and sharp and graphic for a product shot or architecture shot.
3
For extra interest, shoot through glass
This could be a window, a prism, or even a glass! Get creative. Anything the light can pass through will only cause more refractions.
Here’s a photo of a glass bottle shot THROUGH a glass window at a high f-stop…basically the most you can ask of light to do. (WE DID IT!!!!! We broke the light a billion different times! Look at that tiny starburst right on the very top of the bottle. Aww. It’s so adorable.)
And there you have it. Go out and break some light. (And while you’re at it, break that wild horse inside. Mmkay?)
All photography by Katie Day and edited using A Color Story.
Hi, friends! We’re so excited to introduce a NEW effects +pack to the app with Kate La Vie! We are obsessed with Kate’s effervescent blog and love her bright + fresh style. These effects are both realistic and surreal, giving us that magical feeling when light moves in the way that only light can. ?
Let’s take a look at a few of the effects!
before
luster
So fun, this is almost like a filter and effect all in one! Love the rosy glow
spectrum
An intense prism in an all-over pattern. Center this or move to the side for a different look!
aqua marine
A wavy effect, like light reflected from water
crescent
Similar to the Spectrum effect, but a little understated, with more blur
diamond
A bright pop of light with lavender undertones!
hyalite
Obsessed with Hyalite! This one has a subtle flare and rainbow flashes
geode
Intense spots of rainbow prism, perfectly placed to highlight the subject of your photo
scope
Scope has some subtle geometric shapes within its lovely rainbow hues!
ray
A cute lil rainbow!! Use this one diagonally, vertically or horizontally for different looks
flicker
Maybe our favorite in this whole +pack! Flicker is very versatile for different types of photos
jewel
Lots of diamond shapes for a warm, glowy bling!
wave length
A rainbow and lovely sunbeam, this shows up beautifully on darker backgrounds
beam
Cute bubbles for a fun effect! We love this surreal, imaginative look
luminous
Like gold glitter flecks! Use it all over the image or just on one side for different effects
gemstone
In love!! Sunset colors and purple hues frame this effect beautifully
lapis
Similar to Aqua Marine, like light reflected off of water. We love it!!
Now, let’s take a closer look at a few of these effects!
After
Before
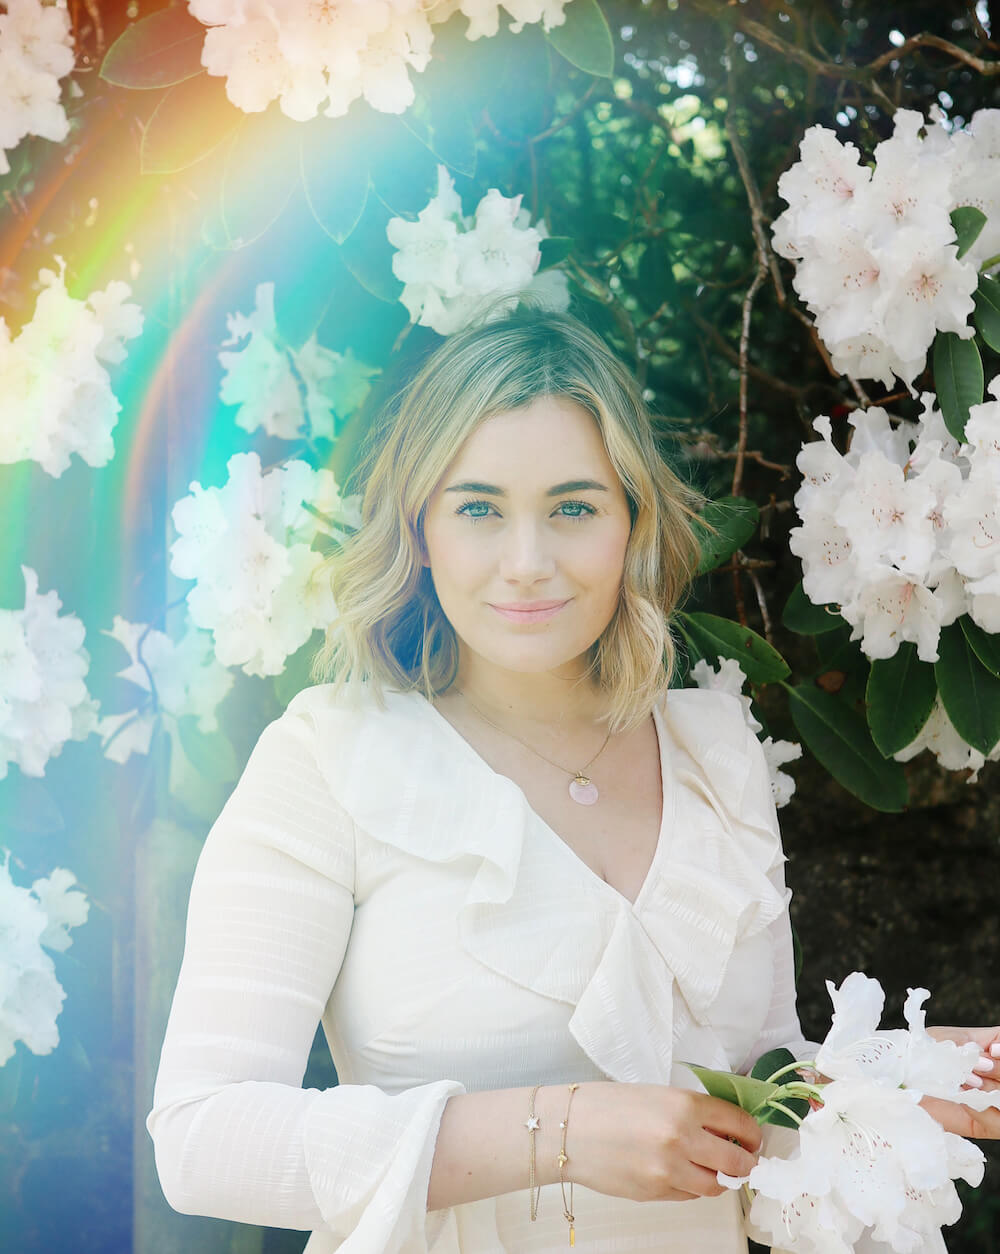
The above image was edited using Spectrum. Loving how this one frames Kate’s face and adds such a fun pop of color to this portrait!
After
Before
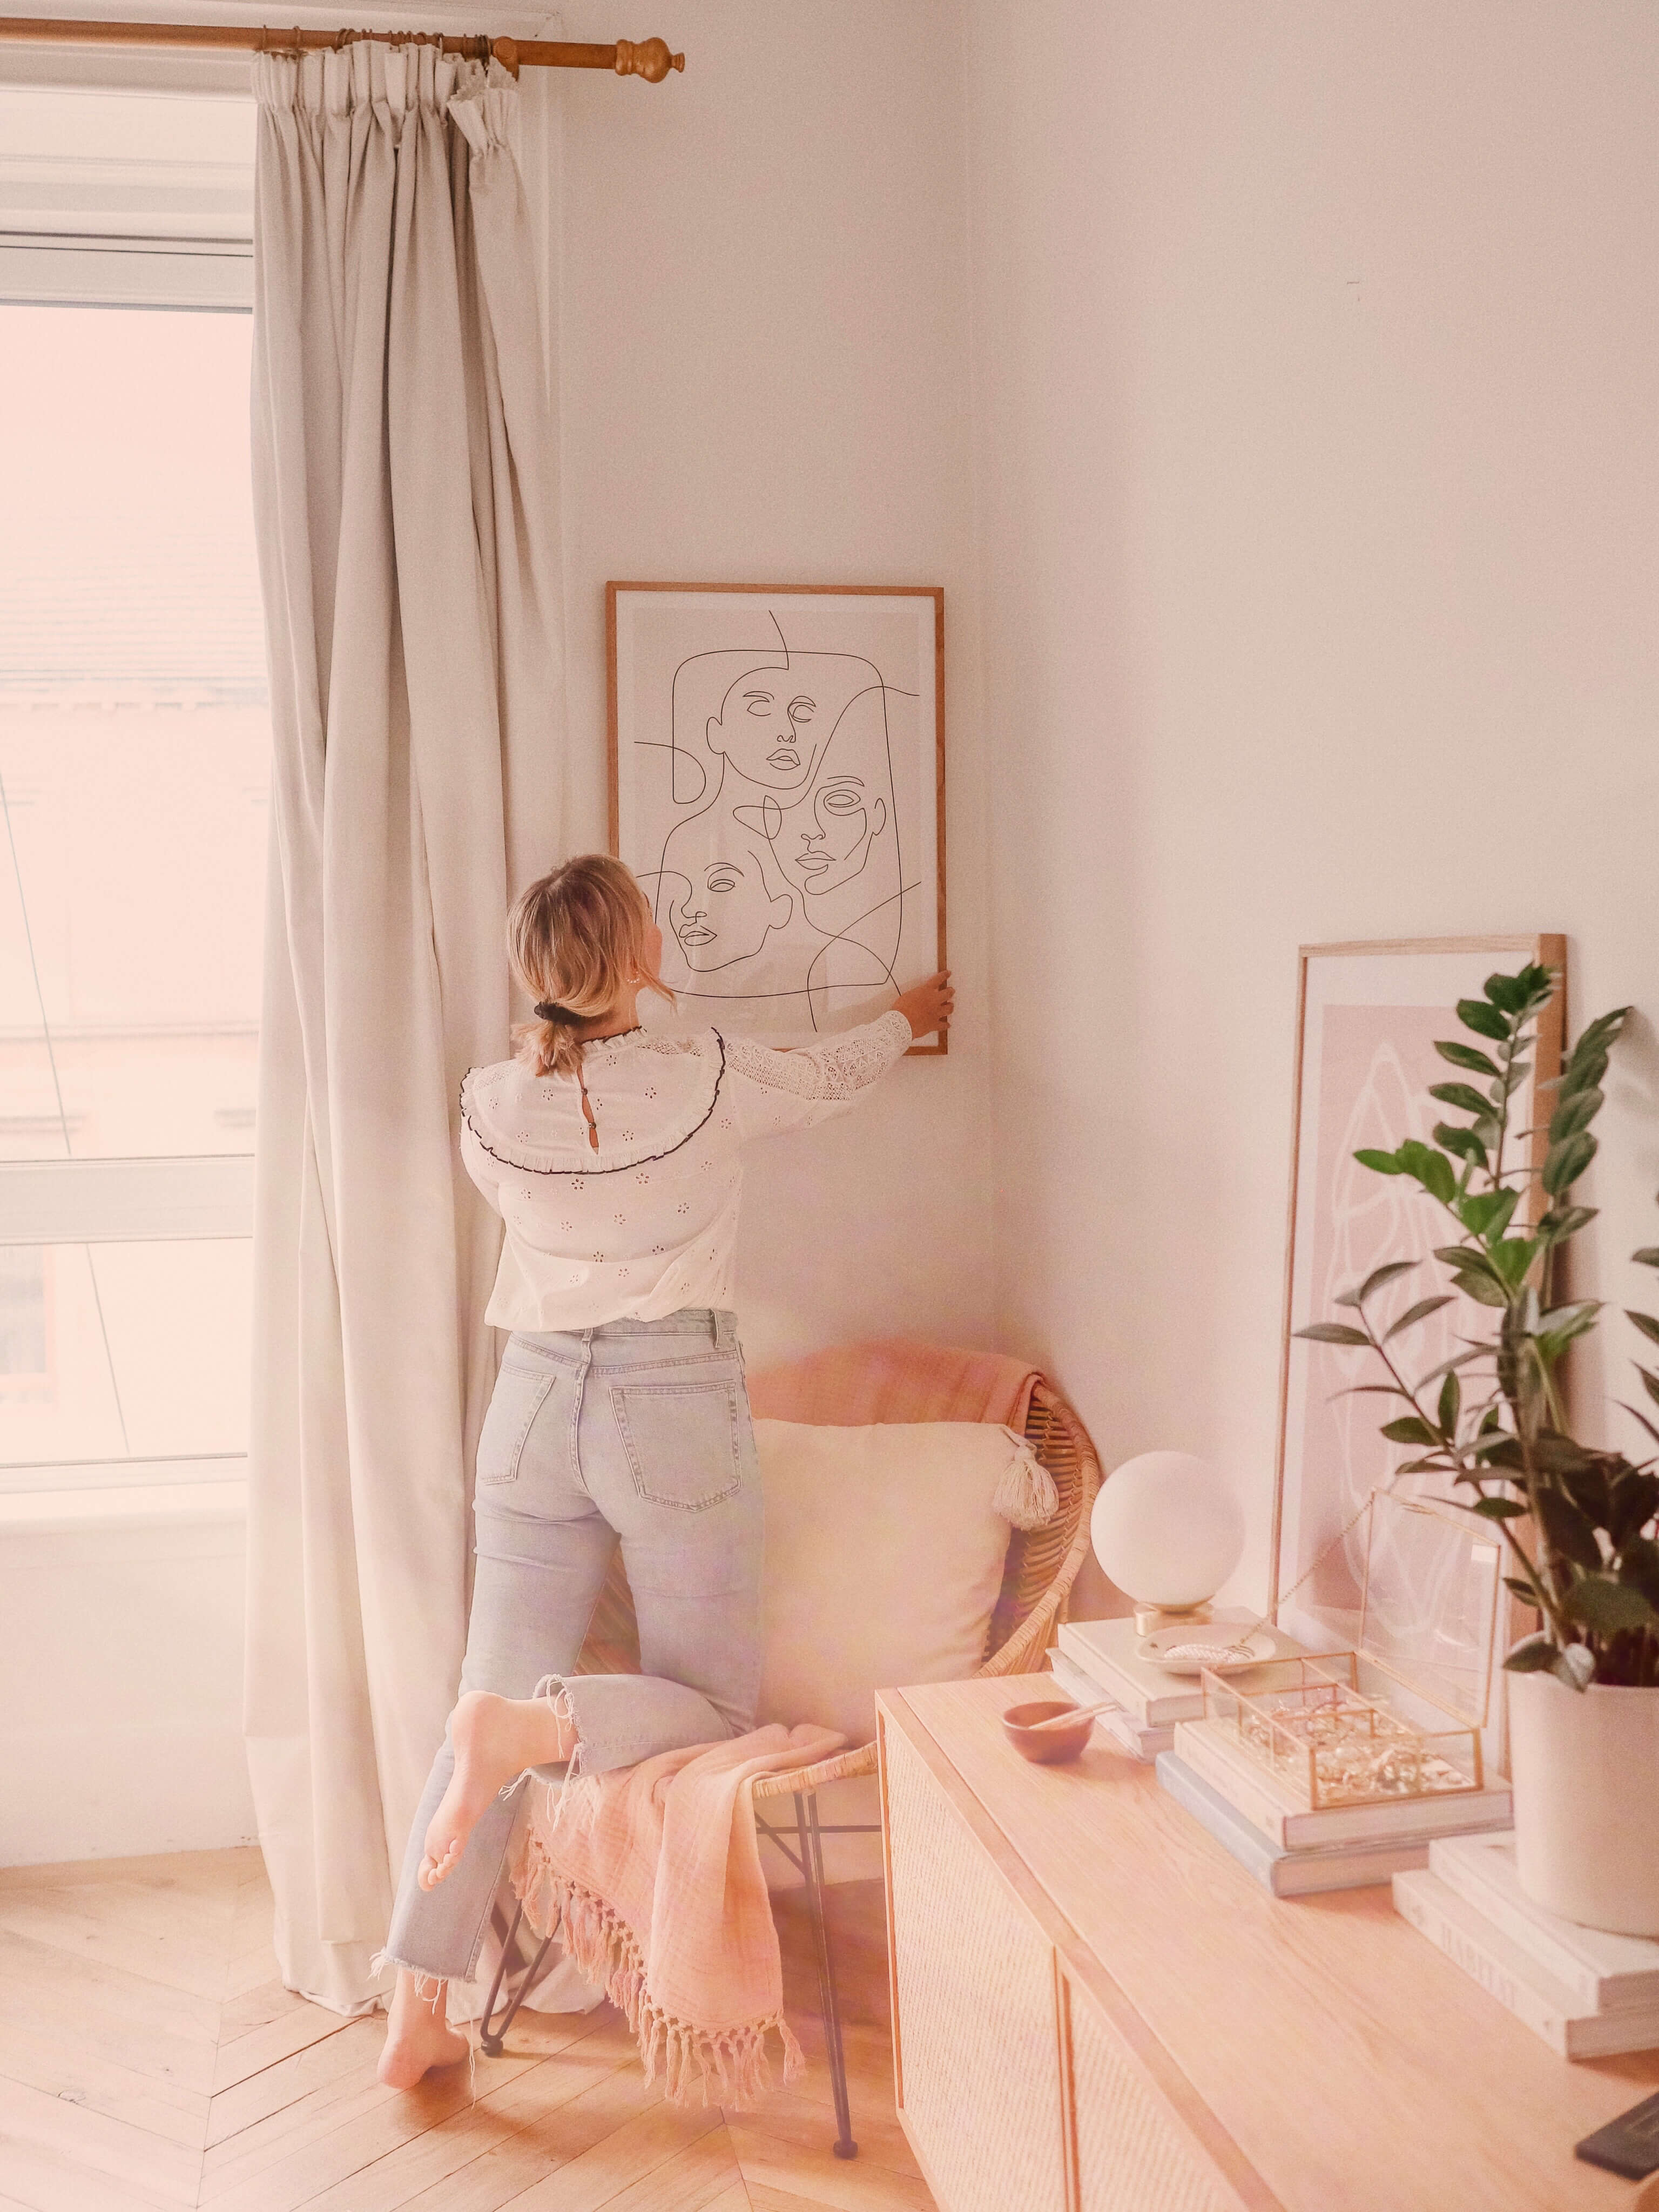
Edited with Beam, we love the bubbles on this one! Love using this one with a luxurious bath, and it would be fun to use with portraits and skies, too!
After
Before
Drag the slider all the way to the left to get the full picture of the effect above, edited with Wave Length. This effect gives the whole photo a completely different feel, almost as if it were edited with film! Super fun.
We hope you’re loving Prism, and if you haven’t gotten a chance to download it yet, you can find it in the Effects section of the app! When you use these effects, share them with us using the hashtag #AColorStoryPrism. xo!!
Our newest filter +pack, Palette, from Teresa Freitas is so unique!! We love the painterly quality these edits provide, and we can’t wait to take you through the filters to show you everything they do.
Let’s take a look at one photo edited 13 different ways, with each of Palette’s filters applied!
before
signature
Signature is a go-to edit with low contrast and pastel blues
modest pastel
This filter has a little more contrast than Signature, with a focus on whites
rosy cheeks
Red + orange are saturated here, as the name suggests!
glossy
Glossy features warm whites and cornflower blues
pastel punch
This filter gives an overall pastel vibe, with pops of saturation
razzle dazzle
Razzle Dazzle is full of bright, cool hues
western yellow
This filter has an overall yellow feel, which shows up as a warm mood
dried sage
Dried Sage has the same feel as Western Yellow, with an emphasis on green hues
lavandula
Lavandula, like the flower name, brings out all the lovely lavender for a beautiful, soft edit
muted
The least saturated of the filter +pack, Muted gives way to true whites and blacks with a dreamy feel
apricot azure
In this edit, blues turn toward teal, while orange and red stand out
infrared pink
The best place to look to see the full effect of this filter are the trees—see how they turn to pink?! Amazing
infrared violet
As Infrared Pink turns greenery toward pink, Infrared Violet does the same with purple hues
There are so many diverse looks in this filter +pack! Palette works great on bright, natural light photos, and we love the candy-colored edits it provides. Now, let’s take a look at a few before + afters.
After
Before
The above photo was edited with Glossy, and we love how taking the contrast down gives this image a completely different feel!!
After
Before
This one was edited with Western Yellow. See how it turns the sky toward a softer blue and brings out the yellows in the field? Loooove this edit.
After
Before
This last before + after shows how the infrared filters work! Infrared Violet turns the green hues into a surreal violet — completely transforming this photo in just one click.
We hope you love Palette, and we can’t wait to see what you create using it! Use the hashtag #AColorStoryPalette to share your inspiring edits. ?
Vivid Wu, AKA @vivid, is the incredible creator behind one of our favorite filter +packs, San Francisco! We recently caught up with her to chat about what’s inspiring — people, places, and colors. Check out this excerpt from our conversation:
Who (or what) is your biggest source of inspiration?
It’s hard to just name one. I am literally inspired by almost everything around me at any given point. First and foremost, I go to the women I call friends in real life and on Instagram. Secondly, I’m lucky to have worked with so many amazing brands and designers around the globe and I get inspiration from all of them. In a nutshell, I can simply be inspired by anywhere I go, anything I see, and anyone I talk with.
How long have you lived in San Francisco?
I’ve been here almost 3 years, and one of my current goals is to buy a house with my husband here in San Francisco. We’re working our butts off to achieve this goal! I love the Victorian architecture here. It gives the city a lot of its charm and character. Many San Francisco neighborhoods have at least a few Victorian houses. My favorite thing to do is wander the streets in my favorite neighborhoods and capture the beauty of these Victorians through my lens.
Who is your current creator crush?
Alyssa Coscarelli or @alyssainthecity. Her feed is everything — she posts about fashion, lifestyle, beauty, and even her apartment is to die for. She really knows how to schedule time for fun outside of work, and she doesn’t exude the same air that some other girls in the fashion industry give off. I had brunch with her once — she’s so beautiful and stylish, so down to earth and passionate about what she’s doing. My top girl crush!
Do you plan your Instagram content very far ahead, or are you more spontaneous? Let us in on your process.
I’d prefer being more spontaneous when it comes to Instagram content. That being said, if it’s a sponsored post, I will have to plan ahead and put it on my calendar. I try not to post several sponsored posts in a row. A good mix of paid and organic posts is very important to me. My routine is to take 4-5 sets of photos for a week’s worth of content and post them in the following week.
If you were limited to just one filter, which would you pick and why?
Little Italy. This is a filter that I find myself using constantly when editing images for Instagram, as it provides a great focus on color, without letting any color overpower another. It’s a simple, everyday filter that’s perfect for almost any image.
After
Before
Thank you so much to Vivid for taking the time to share with us!! You can find her filter +pack, San Fransisco, on A Color Story for iOS and Android.
We’ve loved partnering on the Farmhouse filter +pack with blogger + stylist Liz Marie Galvan! Liz has such a fun style that mixes modern elements with a lot of vintage charm, and we are so excited to translate this into a lovely package of filters. Let’s take a look at each filter, applied at 100% opacity.
before
clocks
Clocks adds instant brightness + warmth to any photo!
mugs
Bright, with a warm take on neutrals
green house
Green House has increased contrast and a deeper-looking green
scales
Shadows are lightened in this lovely filter!
vintage jars
A beautiful, bright filter with vintage charm
bread boards
This one has a more rosy hue than some others in this +pack!
vintage mirrors
Lightened highlights and shadows, to create less contrast
peg rail
Peg Rail has desaturated greens and adds in brightness
farmtable
Farmtable has a warm glow and brings the beauty out of gold!
silhouette
Silhouette offers a bright + faded look, for that vintage charm
artwork
A great filter for bringing out neutrals
painted floors
This filter has a slight pink glow, and we love it!
barn
Barn adds warmth and brightness, and pulls out true whites where present
rolling pins
Rolling Pins is a touch desaturated for a clean edit
board & batten
Full of brightness with lilac undertones!
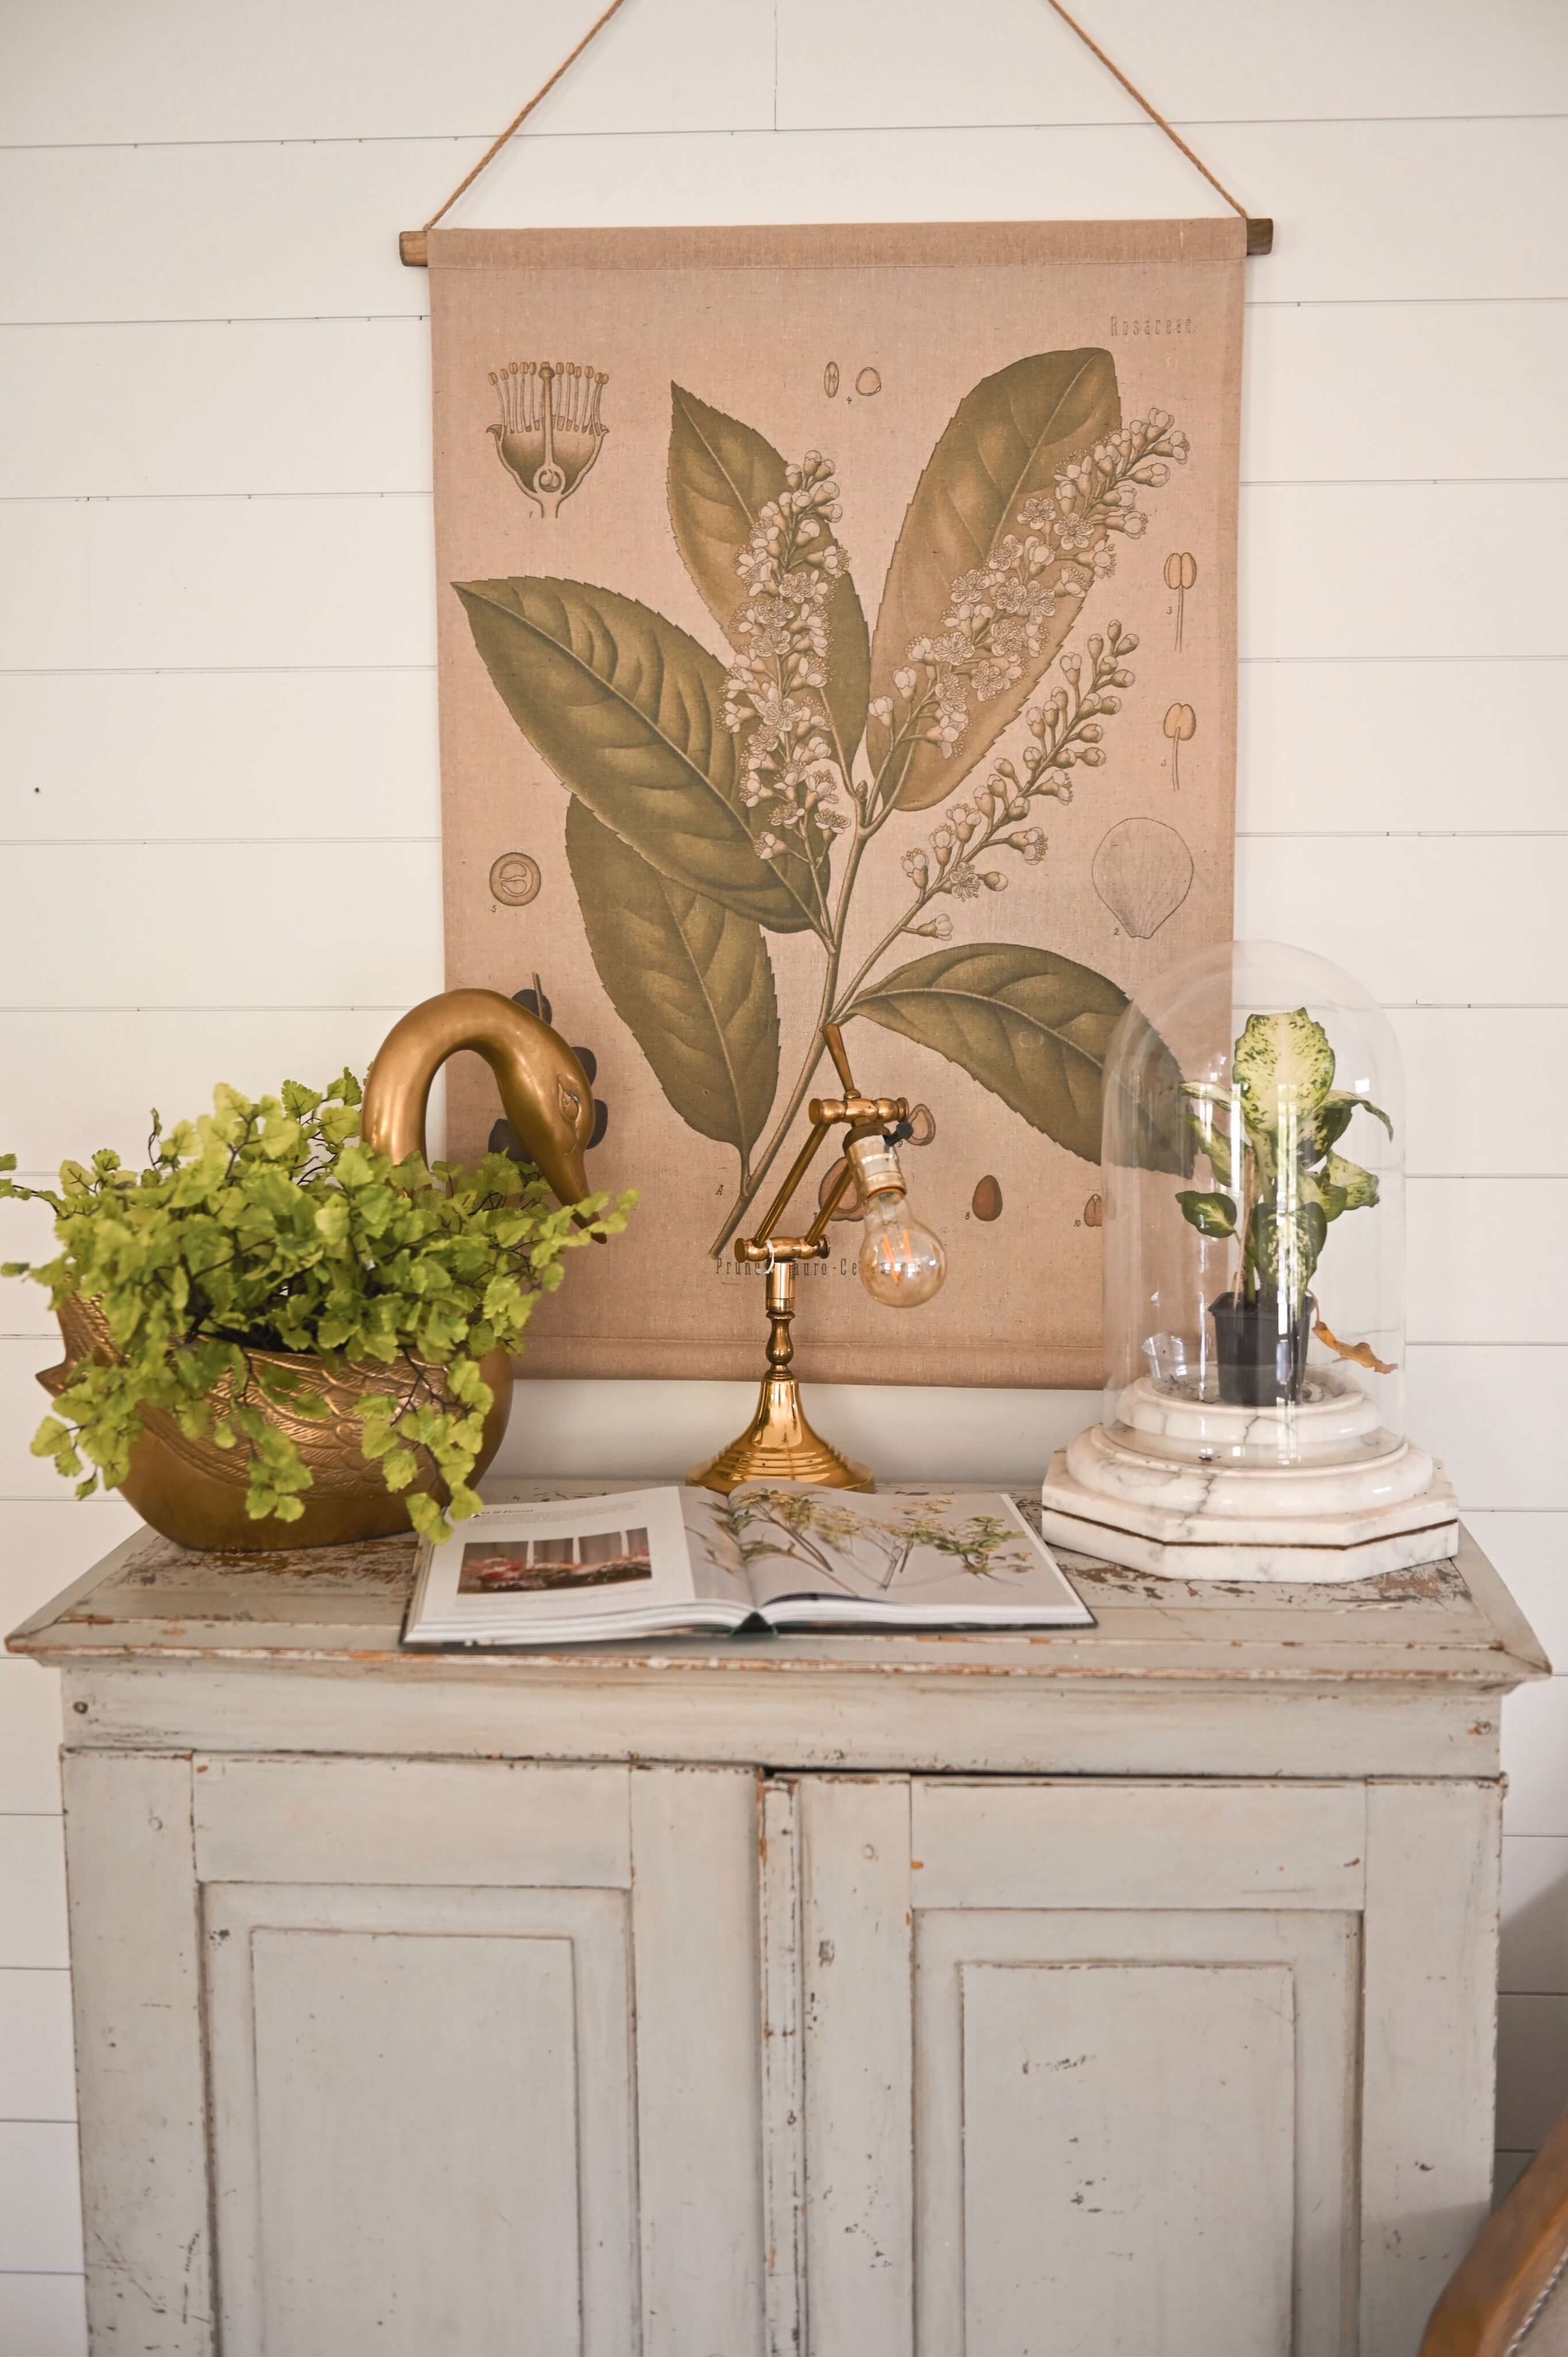
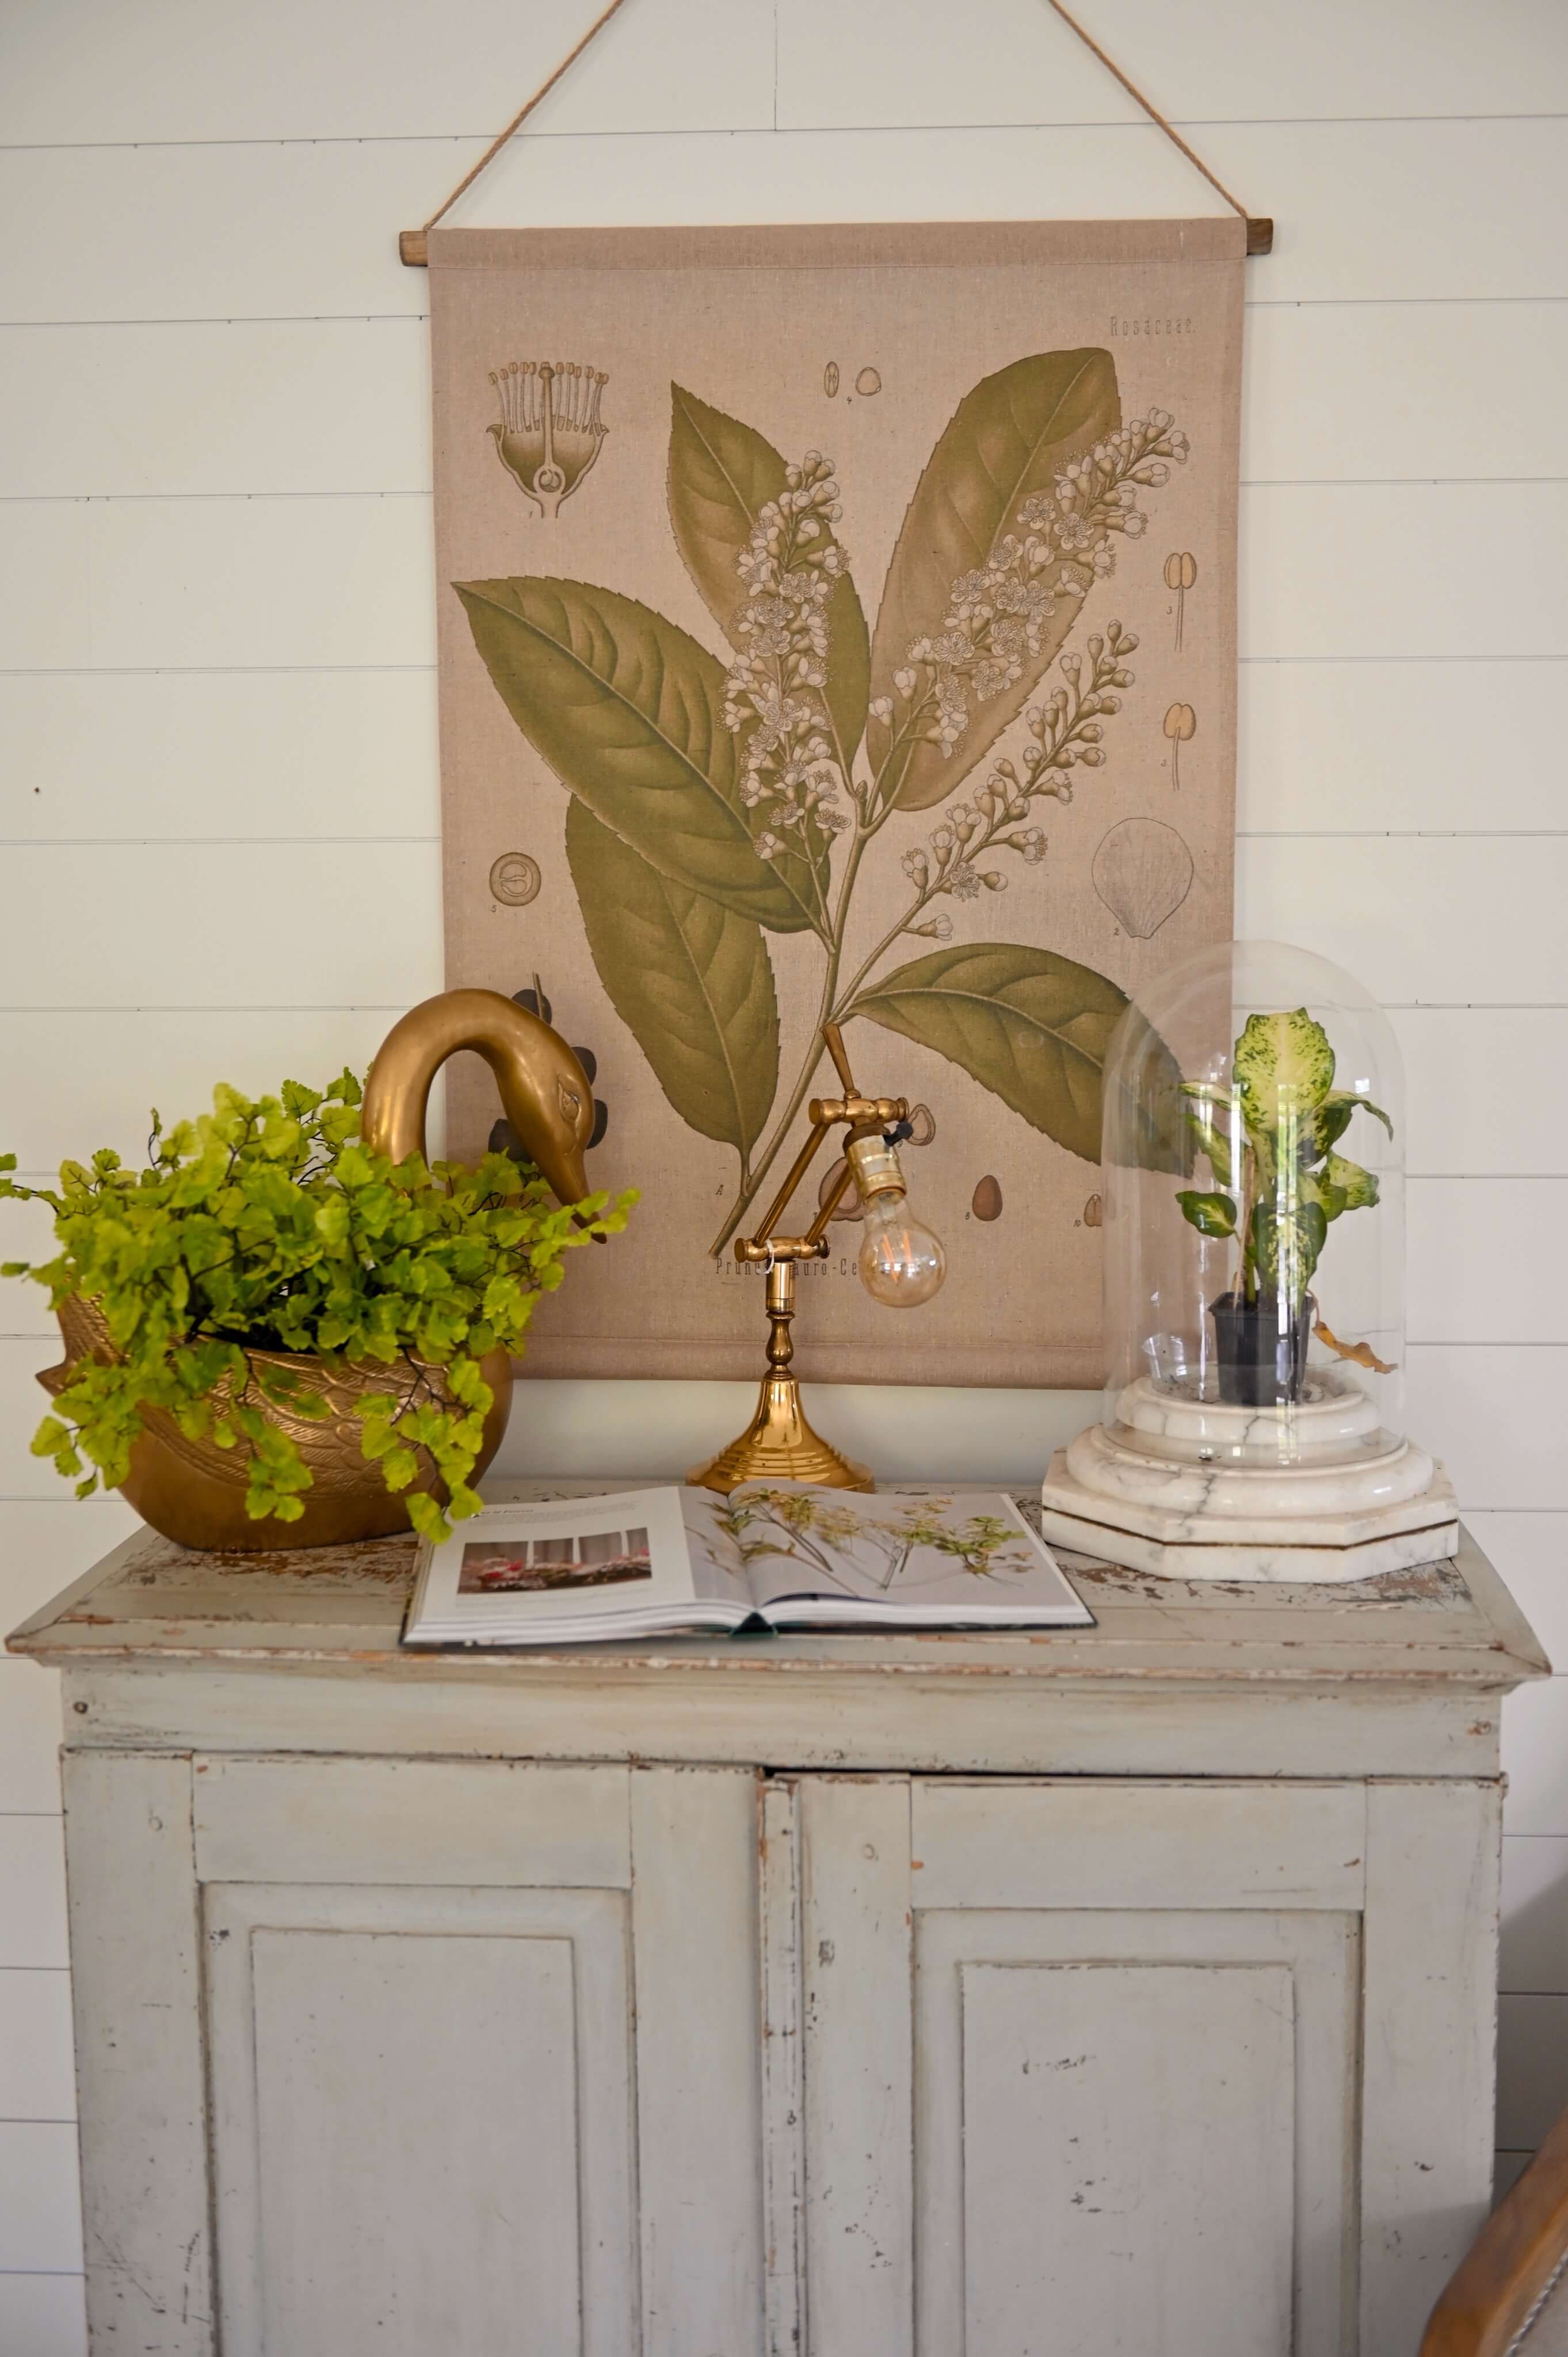
One thing we love about Farmhouse, as you can see above, is that there are so many different options for bringing out varying shades of white! As you know if you have white walls, they can look very different depending on the time of day they’re photographed and how certain light is shining in. Some filters from Farmhouse lean cool, while others lean warm, giving lots of different options for editing the same scene!
After
Before
The above image was edited with Mugs, and you can see how it transformed a cool white into a nice, even warm tone! With a little touch of pink, we love how this one mimics the time right before golden hour.
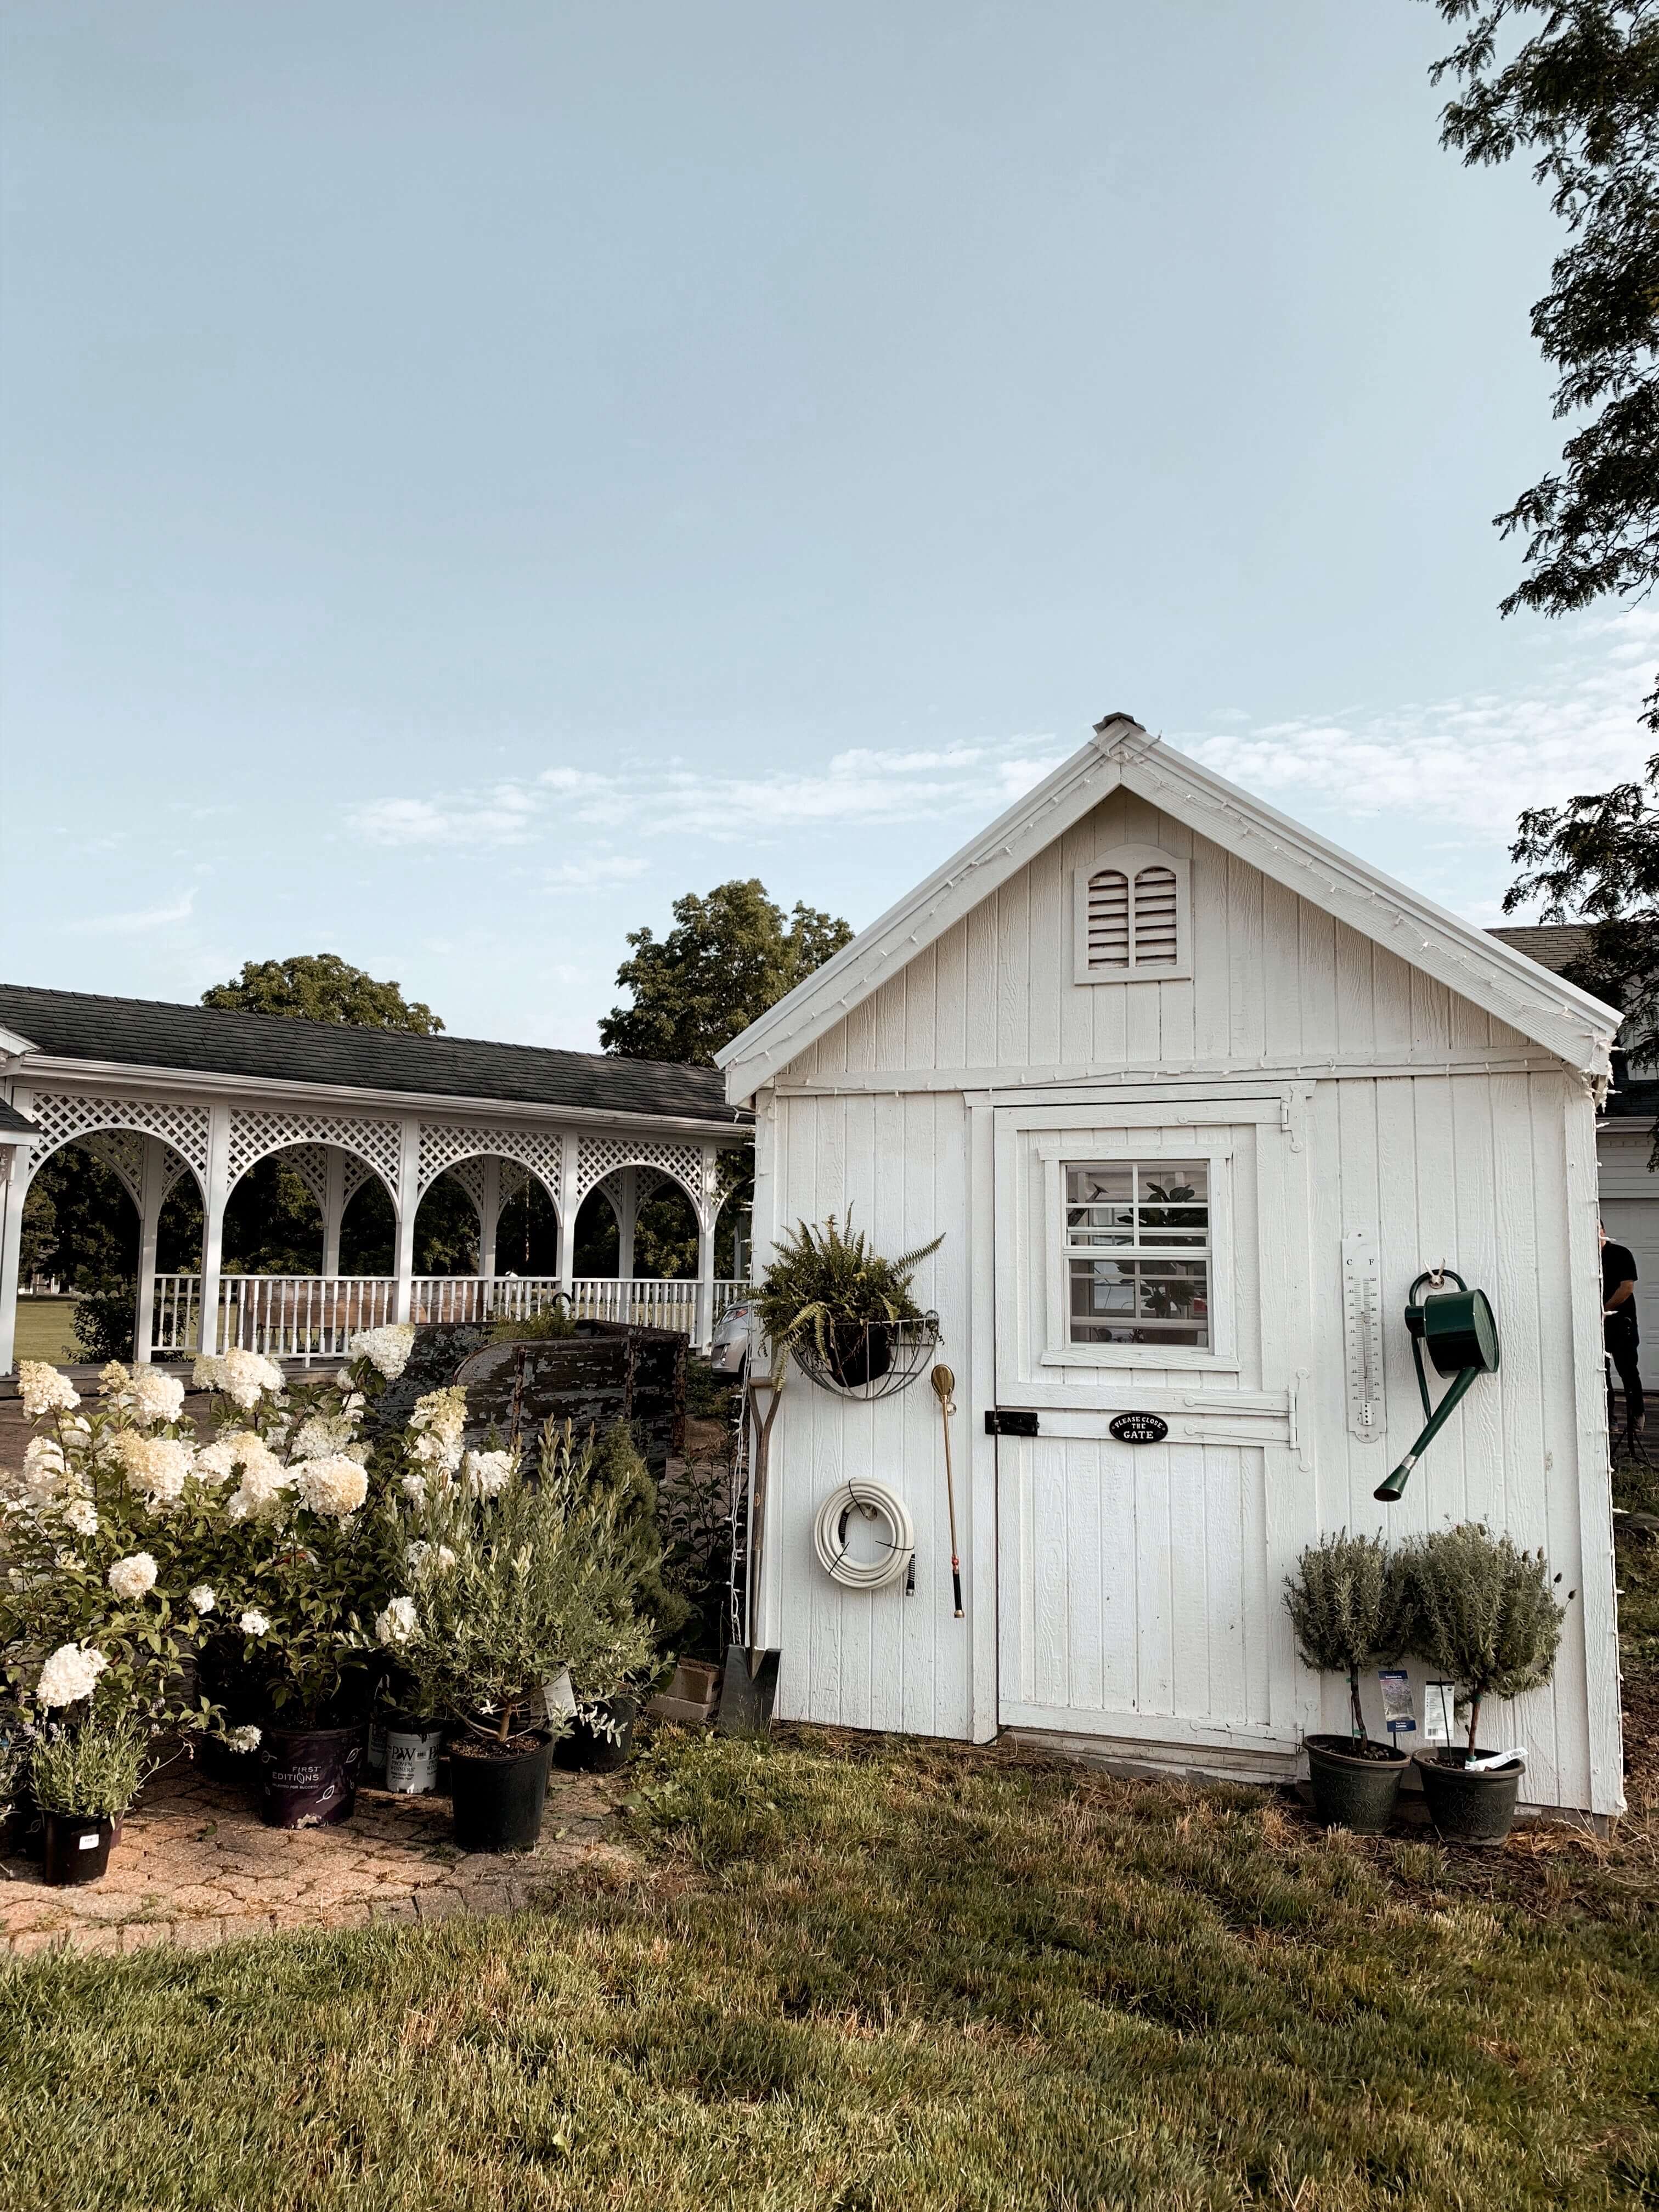
After
Before
The above photo was edited with Green House, and this one shows off Liz Marie’s vibe perfectly! The desaturated blue sky and bright whites are what we’re used to seeing from outdoor photos on her feed—and we’re here for it!
After
Before
The above photo is edited withPainted Floors, and we love how it warms up the whole scene!
We hope you’re loving the Farmhouse +pack, inspired by still moments, white walls, and shiplap. When you use it, be sure to tag #AColorStoryFarmhouse, so we can see your incredible edits!
Hi, friends! Katie Day (@ohkatieday) here. As we enter the holidays, there are two thoughts on my mind.
Holidays!!!
And—How do I get ALL the photos I want without torturing my family?
I constantly find myself torn between two opposing thoughts: “This moment feels so precious that I want to remember it forever and share it with everyone I know!” And “I feel so much pressure to capture this precious moment that I… just… kind of… ruined it for myself.”
Was I actually in the moment if I was clutching my iPhone worried that the battery was looking a little low, thinking about the angle, or if the lighting was good? And worse, did I steal the moment from my family? Is Nora gonna remember building the sandcastle, or is she gonna remember me yelling “Nora!! Show me the sandcastle! Look at mommy! NORA!! LOOK! SMILE!!!!”
The struggle is real: Can we actually capture our lives and still be present in the moment we’re capturing? After much thought—YES, I think we can. And here are some quick tips.
1
Take the pressure off
Let’s begin by reframing our mindset. Do I actually need to record every single thing? Is this personal moment being used for a magazine editorial? For most of us… probably not. Remember when your grandparents ended up with one photo album of their ENTIRE life? Every photo in it feels special. Now we fire off 40 only-slightly-different-photos of our kid and some of us do that almost every day. Take a deep breath, and trust that you’re going to remember your life. You will.
2
Consider the final use of the photos
Where will I use these photos? To post on social media? To print and show the kids 20 years from now? Do I need a set of 60 photos for them to remember it well, or can it be less? Make it a photo-challenge. Can I capture Christmas in 4 meaningful photos? Example: 1. A group shot. 2. Mom’s gorgeous elaborate crisscrossed pie crust. 3. The kids wide-eyed while holding the Christmas Eve service candles. 4. Their reaction to the big gift. (Not every gift. The big one. Wait for it.)
That one photo will mean more to you than going through your iPhone of 600 other just-OK ones. Less really is more in this case. And to think you could spend 20 hours at family Christmases, and only spend 4 minutes of it with a phone in your hand!
3
Don’t pose them! (OK, fine. You get one!)
You get one posed photo that you make people stop for. I get it. You went to the trouble to get the clothes. You’d love one posed photo where everyone is looking and smiling at you. Or say it’s a date night! You’d love a photo where you and your boo are both in it together staring at the camera. Great. Get it right at the beginning where everyone is still clean and the festivities haven’t really started yet. Then be done with that.
4
Become a Photojournalist
There’s no need for you to stop or direct anyone’s actions the rest of the time. (Read: the rest of the holidays. The rest of the entire vacation!) You don’t need a posed photo every day of a 7-day trip. Or at every new tourist spot. I’m talking one posed photo. Total. Because you aren’t gonna use 47 posed photos. The point here is to document what’s actually happening. Is great grandma teaching your daughter how to make her famous peanut butter balls? Capture that, of course! But do you really need them to be looking at the camera for that photo to be precious to you? I might even argue it’s more precious to capture them in the wild.
5
Try a DSLR on an ordinary day
There is something about shooting with my big camera that I actually believe has the power to make me more present. (Woah. Hot Take! How Controversial!) One of my favorite times of day is when my kids get off of the school bus and we take a minute to have hot cocoa and do homework and talk about their day. If I decide to photograph that moment, I can actually feel “my eyes turning on”. I can “see” them in such detail. When did Sadie’s eyelashes get so long? Look at the way she looks up to her big siblings! And a bonus: The lens quite literally blurs the background. It blurs away the pile of laundry I haven’t put away. I literally can’t see that as clearly as my kids in that moment, so I am being forced into a state of presence.
Challenge: Pick an ordinary, no-pressure moment, and elevate it to art!
You might find that you cherish these photos later more than any forced, posed, over-hyped holiday or vacation photo. And it will help you to learn your camera better so that during your special moments you’re not worried about camera mechanics, you’re thinking about the moment at hand. (And if you want to make those moments even more artful, play around with the 700+ filters available in A Color Story).
Hello! We hope Cozy season has been treating you well—and we’re here with some tips on how to use our newest filter +pack inspired by this time of year! We believe every day is worth capturing, and these filters work well for indoor photos and even poor lighting conditions. We all know the best memories aren’t always set up in perfect lighting!!
Let’s take a look at each filter from Cozy, applied at 100% opacity.
BEFORE
cozy
Bright + warm, just like cozy should be! We love this filter.
fireside
Fireside has an overall red tint to it and light shadows
cuddle
Cuddle focuses on leaving reds bright and desaturating greens
SHELTER
Shelter is one of the darker filters in the +pack with a warm glow
Comfy
Bright and full of contrast! This filter works great for many lighting scenarios
ZZZ
ZZZ leans pink + dreamy, as you would expect from its name!
Candle
Candle is warm and golden, like viewing your scene through candlelight
hygge
Hygge keeps shadows dark and adds just a hint of warmth!
Cottage
Cottage is a close filter to Hygge, where the warmth leans pink for a cozy feel
Content
Content is a great filter for indoor photos as it adds just the right mood
Smores
With Smores, reds take on a beautiful cranberry-colored hue
Glowing
Glowing is similar to the Cozy filter, with deeper, more evergreen hues
Lights
The shadows are lightened in this filter, creating low contrast and the perfect time for lights to shine
Sleep in
One of the brightest in the +pack! Like how the sun looks when you’re trying to sleep in
EARLY BIRD
Mimics the grey of the sky in the early morning hours
Night
Night carries a little less saturation than others in the Cozy +pack
home
A filter that’s both warm + deep! Love the golden tones in this one
Cherish
Cozy warmth for memories to cherish!
The overall focus for Cozy is warm + bright, as you can see from the examples above! Within the filter +pack, there are many different takes on the cozy time of year. Cozy, Comfy and Hygge are a few favorite filters from the +pack, but we truly love them all!
After
Before
The above image was edited with the Candle filter and brightness, and we love how dramatic this transformation is!! Candle gives a really great warm hint without feeling too yellow.
After
Before
Love this photo of Elsie and Nova decorating their Christmas tree!! This is a great example of how the Glowing filter works in indoor lighting.
After
Before
The photo above is edited with brightness and the Sleep In filter. Love how it makes this centerpiece really pop!
We hope you’ve captured some memories using the Cozy filter +pack, and we’d love to see how you’re staying cozy this season! Share your photos with us using #AColorStoryCozy for a chance to be featured on our Instagram feed. ❤️
Hi and happy holidays, friends! ‘Tis the season for many things—overindulging in delicious food being one of our favorites. Are you baking or making anything special this year? If so, you’ll want to capture it well for your memory book! We’re here to help with that.
If you’re going for a natural look for your food photos (no green eggs & ham!), it’s best to choose a filter that enhances the colors of food that are already present in your photo. You can use color shift and more dramatic filters for your food photos, too, but these tips are for keeping it looking realistic. Let’s get to it!
Find Good Lighting
Finding good lighting is going to be the top of all of our photography recommendations, but it’s especially true when trying to capture food. Carrie from Flashes of Delight takes the “blah” out of this photo, and puts the focus on the eggs & blueberries—yum!
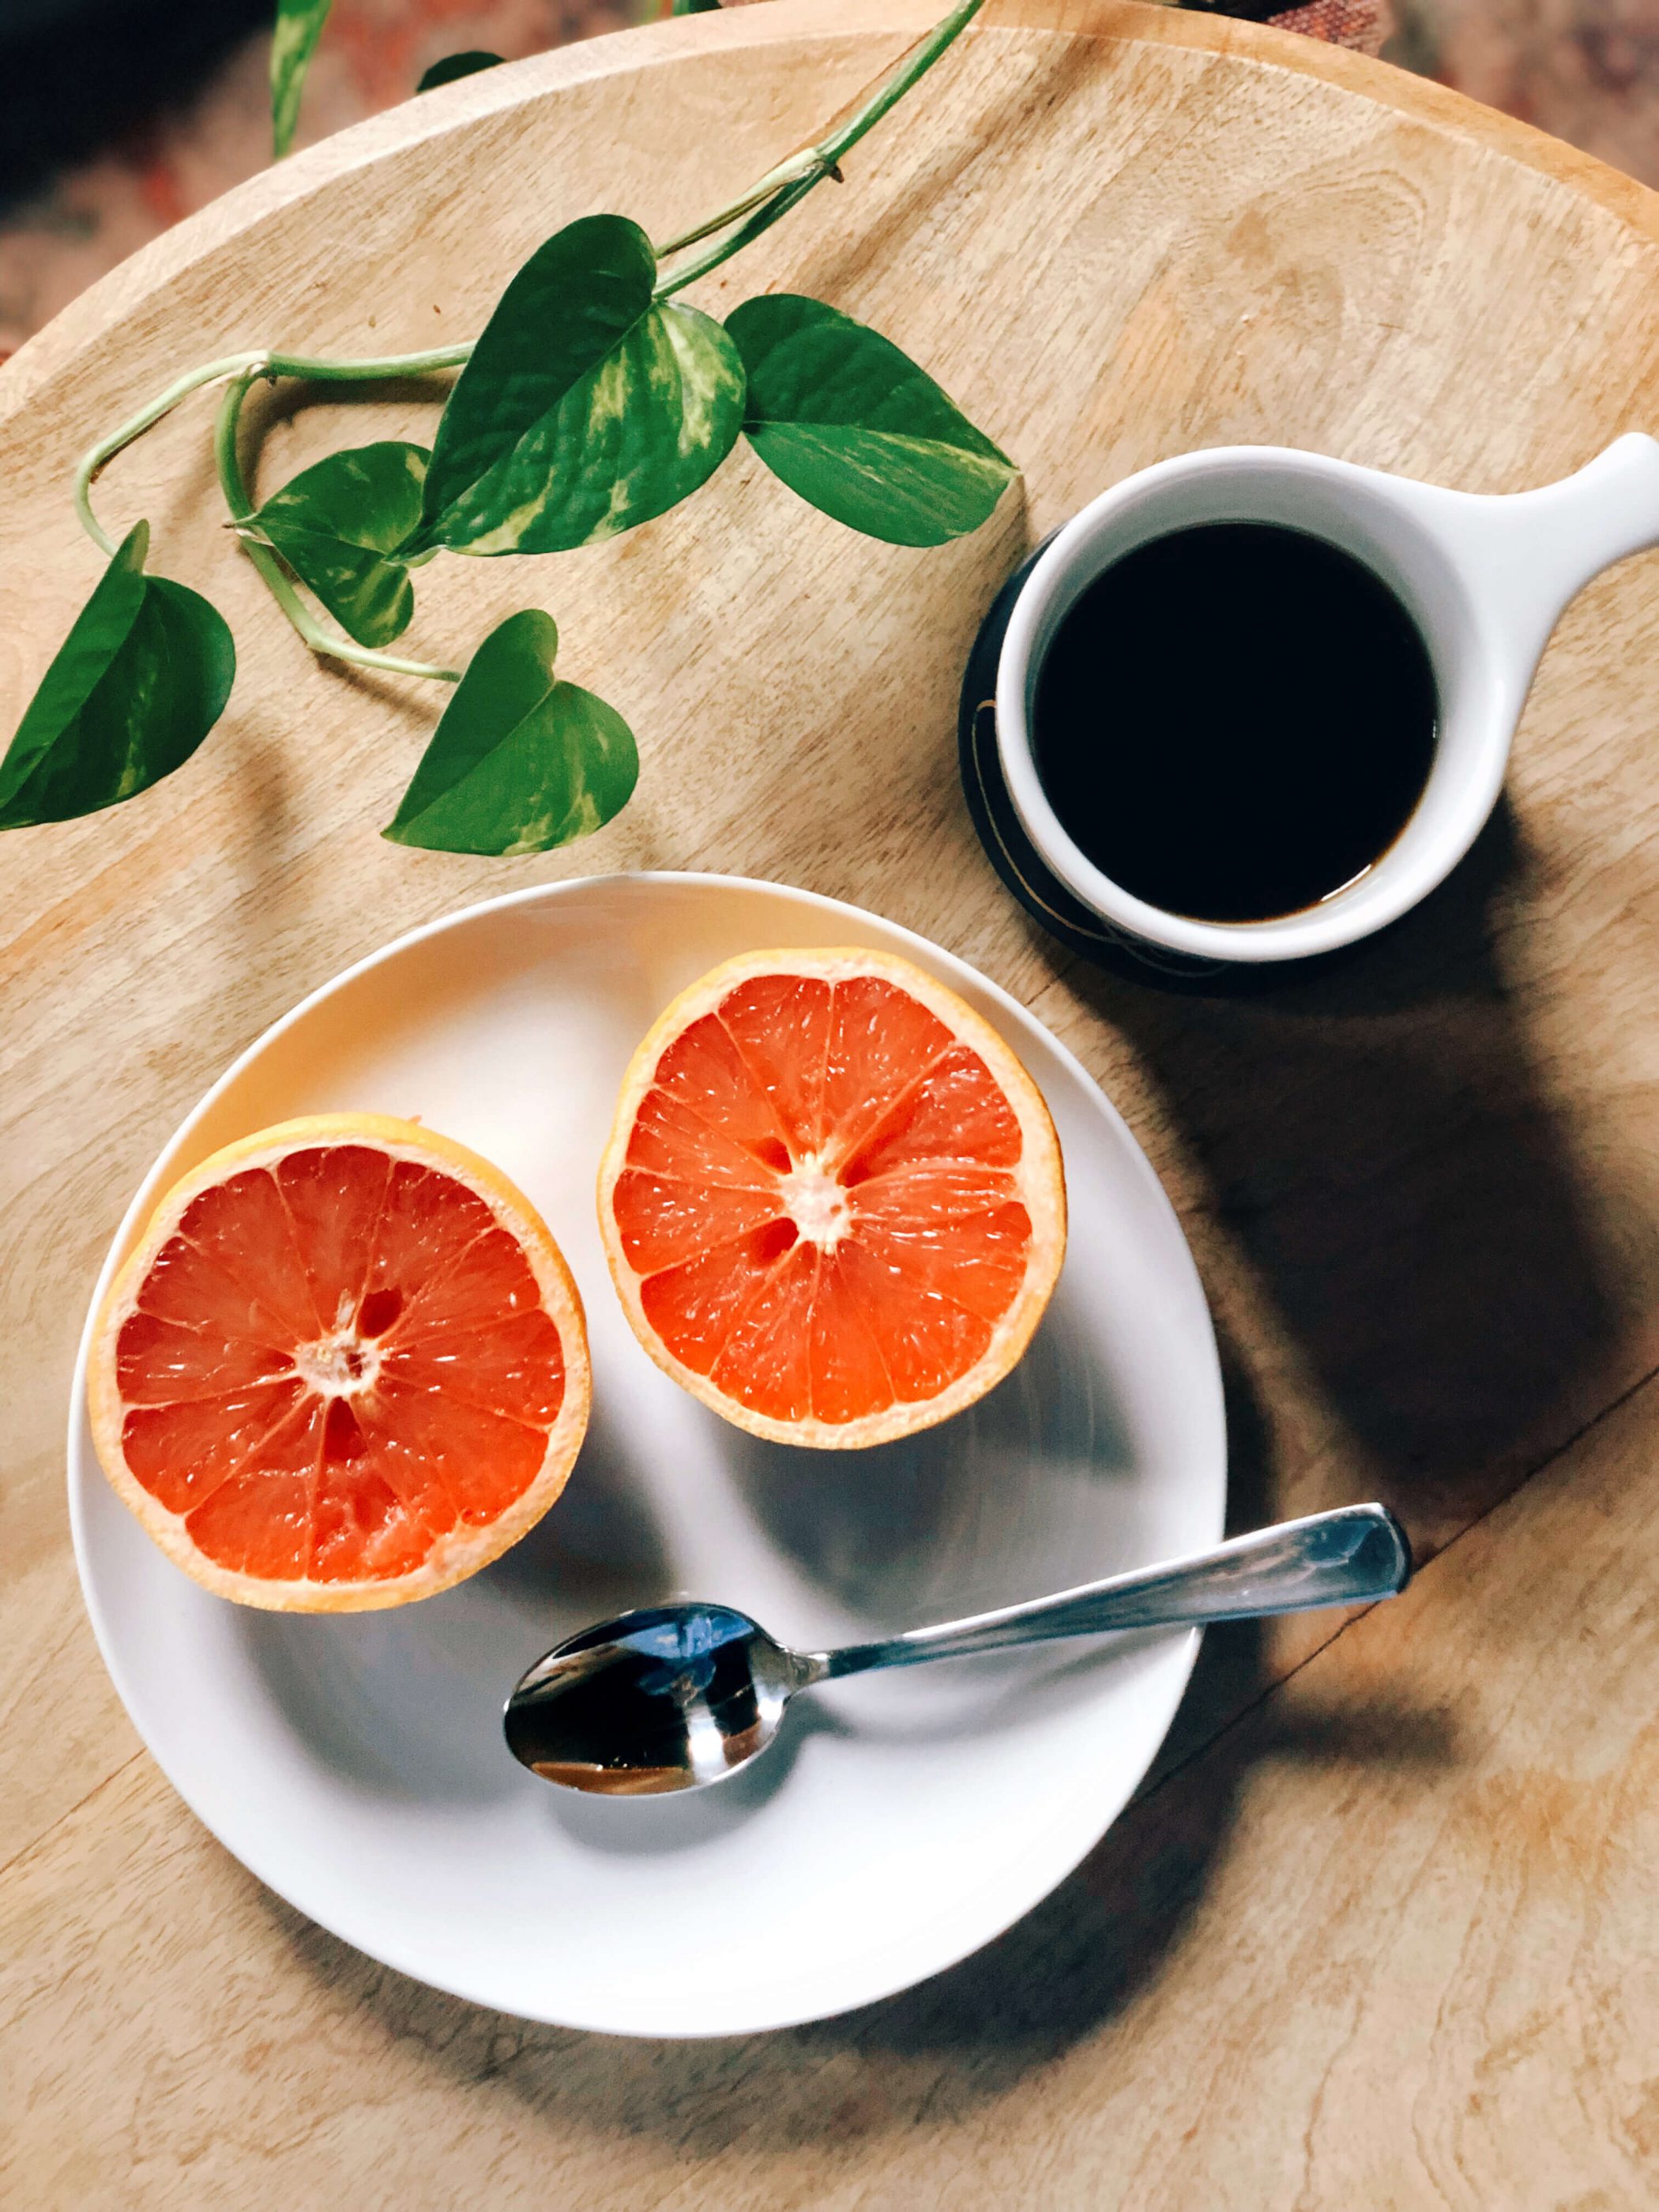
Consider Your Composition
This is your opportunity to direct the eye where you want it to go! Notice how in the photo above, the additional elements create the scene that’s all about the grapefruit. Using January from the Seasons pack took out any unwanted yellow tones from this photo, so the pink of the grapefruit can really shine.
A Color Story’s tools are your BFF!
The above photo was edited with Fresh from the North West pack, Curves, Temperature adjustments, Contrast, and Sharpening. While the filter is an easy way to create a mood, the tools can help you perfect your photo so it’s extra impressive.
Use Saturation When Appropriate
You’ve got to be careful when adding saturation to food photos, but when used appropriately, it can really enhance the image!! The above was edited with Suntan from the Summer pack and a little saturation added to the ramen bowl utilizing the selective edit feature in our iOS app.
Consider the Colors In Real Life
On the note of saturation, a good way to choose a filter is by considering what these colors look like on the plate and then making sure the filter is translating that well! For this photo, Sugar from the Picnic pack brought out both the color of the soup and the cilantro, while brightening the overall look of the image. OK now we’re hungry!!
Consider the Mood You’re Trying to Capture
Here’s where we give you a list of tips, and then tell you to break all the rules. More than composition, color and saturation, your photos (even photos of food!) should capture the mood you’re trying to highlight. While this photo (edited with Marrakesh from Jetsetter) is much more warm/orange than this pie looked IRL, it translates the feeling. Do you feel the pie vibes?!
We hope this has been helpful and you take the time to enjoy your food and the company you share it with. xo!
This website uses cookies to improve your experience. We'll assume you're ok with this, but you can opt-out if you wish.AcceptRead More